Map Designer Guide
Quick Start
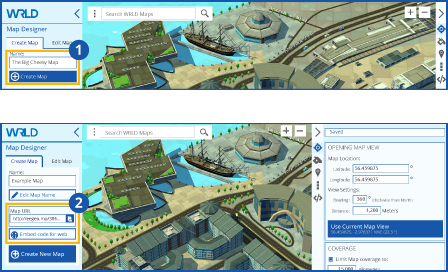
- To create a map, simply enter the name of your map in the name field and click the create map button.
- At this point you’ve created your first 3D map and can can copy its short URL (web address) to a browser, embed it in your web page with a marker pointing to your location or open the link from a mobile device to view your map in our mobile apps.
Have a read through the rest of the help section below for the low down on managing and customising your map.
Map Designer Overview
So creating your first map is pretty cool - but it doesn’t look much different to any other eeGeo map. Let’s look at how the Map Designer can customise your map to your needs.
A quick overview of the layout will help.
Layout
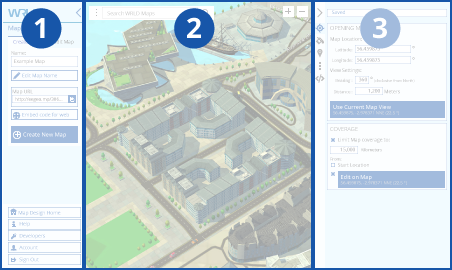
Map Designer is split into 3 vertical panels.
- Left Panel: Is for managing your map - creating and editing your maps name along with viewing/copying the short URL (web address). The bottom part of this panel contains navigational links to your map design homepage , help pages, map developer pages and account management pages.
- Center Panel: Is the map layer to help determine your preferred start location and preview your map content and settings.
- Right Panel: contains all the controls and setting which help to fine tune your map. There’s also a JSON editor in this panel where you can quickly check the your map configuration as defined by the Map Designer Tool.
Managing Your Map
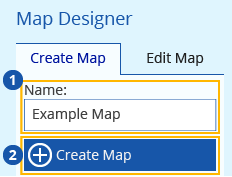
Create Map Tab:
- Name: Give your map a name and the Create Map button is enabled. Easy! You’re ready to start customising.
- Create Map button creates your map and presents options to share it.
Sharing Your Map
Create Map Tab:
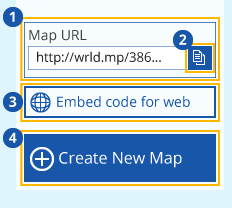
- Map URL displays the short URL (web address) of your new map and there’s a handy
- Copy Map URL button at the end which copies the address to your clipboard. (so you can paste it in a new browser and view the map or share it as a link).
- Embed code for web button pops up a dialogue window where you can configure a map for your web page which has a marker in the center, indicating your location. The link is provided as inside an <iframe> and can be copied using the blue copy button and pasted into the code for your web page.
- Create New Map begins a fresh map.
Edit Map Tab:
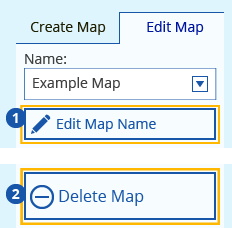
- Edit Map Name: button will pop-up a dialogue allowing you to rename your map.
- The Delete Map button will indeed delete the map - but relax - we’ll show a pop-up window asking you to confirm before we delete it.
Map Design Navigation
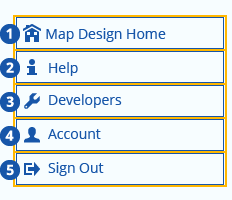
The lower part of the left hand panel is home to the navigational links which lead us to the rest of the admin and tools that comprise the Map Design suite.
- Map Design Home links to the home page where your maps are listed alongside links to and explanation of the other tools and pages.
- Help button links to the help pages you’re visiting now, where we’ll walk you through the tools and how to use them to create and share your custom 3D maps.
- Developers button links to the Map Developer portal where you can download tools to include and extend eeGeo 3D maps for your own applications.
- Account button links to your profile page where you can manage your own details and price plan.
- Finally, use the Sign Out button if you must. We look forward to seeing you next time for some more 3D mapping. :)
The Map Panel
The Map Panel is useful firstly to determine the location and view where you’d like your map to open. Secondly - the map view is for previewing the content and style you’d like your map to feature.
You can interact with the center panel exactly like the maps at maps.wrld3d.com:
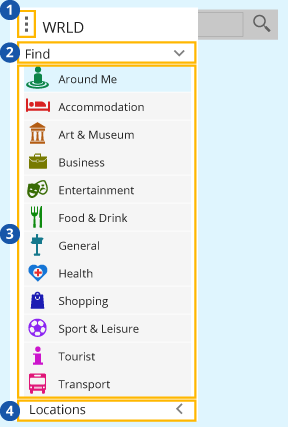
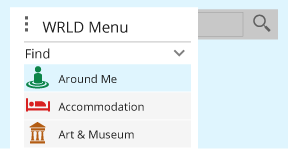
- The Menu button opens the menu to reveal 2 drop down panels.
- The ‘Find’ drop down panel displays …
-
…Category buttons that can be used to search for associated places (sometimes called points-of-interest) information on the map.
You can configure your own Category Buttons for this menu using the map designer and preview that menu here.
-
The ‘Locations’ drop-down lists buttons linking to popular map destinations that reflect our map coverage.

- The Search Input field is the primary way to interact with the map and find content.
- + and - buttons control the zoom level of the camera. This can also be controlled by scrolling the mouse wheel.
Customising your map

- Autosave - your map settings are automatically saved so no need to worry about losing any of them.

The Right hand panel contains all the controls and setting which help to define your map and and the information it contains. There are 5 tabs on the left hand side of the panel which switch between the various settings panels.
Lets walk through the settings and options:
Opening Map View
This panel sets the map position as well as the camera direction and distance that your map will open with.
We’ll describe the options below but navigating to a view you’re happy with directly on the map in the center panel and clicking the..
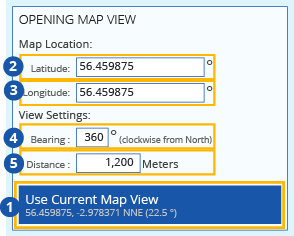
- Use Current Map View button will set the opening map View to match your current one.
- Latitude sets the opening latitudinal position of the map. You can type or paste a value in here for convenience.
- Longitude sets the opening longitudinal position of the map. You can type or paste a value in here for convenience.
- Bearing sets the angle the camera is set to. 0° points North. 90° points East etc.
- Distance sets the distance the camera is from the map.
Select a Theme
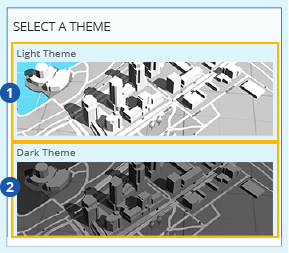
This panel allows you to select a theme for your map.
- Light Theme and
- Dark Theme
…are designed to work well with data visualised on top of the map while the others are mostly for fun but do offer advantages for different types of use, e.g. games or navigation . :)
Places to Include
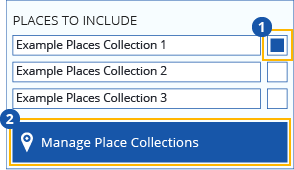
This panel allows you to include Places that you’ve created in the Places Designer as searchable information sets in your map. A list of your places collections appears in the panel and simply…
- …check the box beside the ones you want to include.
-
A button to Manage Place Collections links to the Place Designer tool so you can create a new Places set to include or edit an existing one.

- Searching on the map for Places collections you’ve chosen to include will allow you to preview those Places in search results and on the map
Find Menu
This panel allows you to define your own Search Categories in the ‘Find’ Dropdown list within the main menu on your map. You can leave categories as they are in our default set or create custom categories which will search for content from your own places collections.
(Custom Tags can be created in the Places Designer and will appear as an option in the tag list here automatically. This allows you to specify that a custom category searches for your custom content).
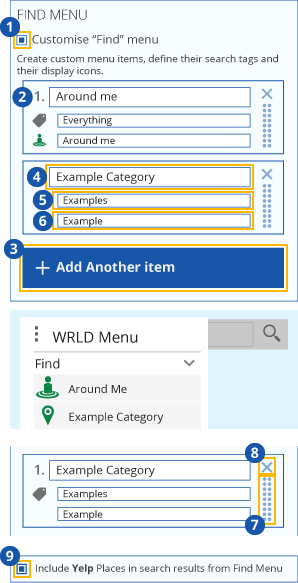
- Checking the ‘Customize “Find” Menu’ checkbox allow you to begin setting up your own menu.
- The default ‘Around Me’ category is already set up in a category card for your reference though you can delete it if you prefer. ‘Around me’ performs a search for all tags referenced in your places’ collections - it’s quite a useful category to lead with.
- Add Another Item creates a new category card with 3 text fields.
- Name - this will be the name visible in the Find drop down list
- Tag to search - select the tag you want this category to search for from the list
- Icon - Select the icon from the list that you’d like to represent this category. You can preview the new category on the map by opening the main menu and the Find dropdown.
- Using the drag handles you can swap the positions of the category cards in the list which will reflect in the order in which the categories appear under the Find dropdown.
- Deleting a category card will of course remove it from the Find dropdown
- Include Yelp places in search results from Find Menu. Checking this box will return results from the Yelp search engine along with results from your places’ collections when performing a search on any of the categories in the Find menu.
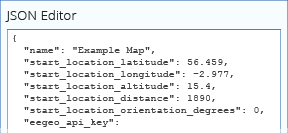
JSON Editor
Finally the JSON editor gives a view of the markup code that defines all the map settings which you’ve configured. If you’re comfortable working in code you can add/edit map settings directly in this view.